
How To Pipe a Leaf to Add Dimension and Interest In Your Cake Decorating Design
Using a leaf tip for piping buttercream is a great way to create realistic-looking leaves and foliage for your cake decorating projects. Here's a step-by-step guide on how to use a leaf tip:

Materials and Equipment:
-
Leaf tip: You'll need a leaf-shaped piping tip, such as a #352 or a similar tip.
-
Piping bag: Use a pastry bag or decorating bag to hold your buttercream.
-
Buttercream: Prepare your buttercream frosting in the desired color. You can use buttercream in shades of green for traditional leaves, or you can customize the colors for various creative designs. At Sweetology, we like to take it up a notch and mix different shades to create a more realistic and interesting leaf.
Procedure:
-
Prepare the piping bag:
- Attach the leaf tip to the end of your piping bag. Make sure it's securely attached.
- Fill the piping bag with the colored buttercream. Be sure not to overfill it, as this can make piping more challenging.
-
Hold the piping bag:
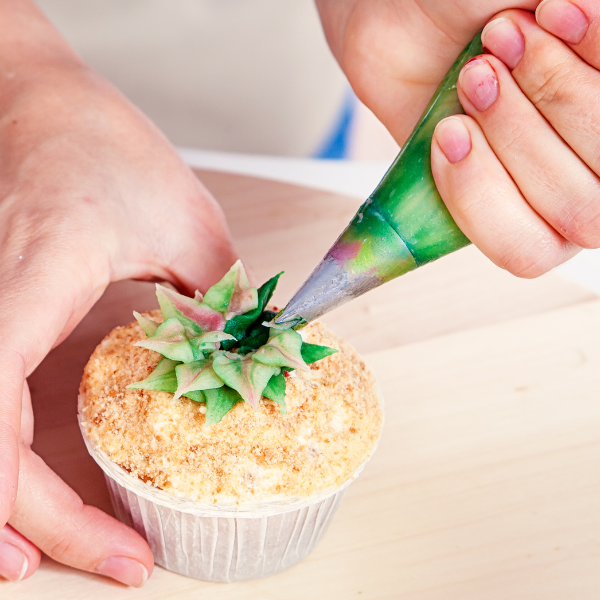
- Hold the piping bag in your dominant hand. Position it at a 45-degree angle to the surface you'll be decorating. The wide end of the leaf tip should be facing outward. We like to think of it as a alligator jaw. The jaw should be positioned up and down.
-
Practice pressure control:
- Before you start decorating your cake, practice your piping technique on a piece of parchment paper or a clean surface. This will help you get a feel for the pressure needed to create the desired leaf shape.
-
Pipe the leaves:
- Position the piping tip where you want to create a leaf on your cake.
- Squeeze the piping bag gently to release a small amount of buttercream while moving the tip away from the starting point. This creates the pointed tip of the leaf.
- Then, gradually release the pressure on the piping bag as you pull it back towards the starting point. The leaf tip will naturally create the shape of the leaf, including the central vein and the scalloped edges. (Tip: squeeze and then pull away).
-
Repeat and vary:
- Continue to pipe leaves all around your cake, varying the size and orientation of the leaves to create a natural look.
- Overlap leaves slightly to create depth and dimension in your foliage.
-
Add details and colors:
- If desired, you can add additional details to your leaves, such as small lines or dots to mimic the texture of real leaves.
- You can also use different shades of green or even other colors to create more realistic and varied foliage.
-
Complete your design:
- Continue piping leaves and foliage until you achieve the desired look for your cake.
- Once finished, you can add other decorations or flowers to complement the leafy design.
-
Practice and patience:
- Piping leaves with a leaf tip may take some practice to master, so be patient with yourself. The more you practice, the more precise and realistic your leaf designs will become.
Using a leaf tip for piping buttercream can be a fun and creative way to add a natural and decorative element to your cakes, cupcakes, and other baked goods.